
How to download kali linux 2 (sana) and install in latest vmware workstation :-
Kali Linux Official Download (2.0 , 32 & 64 bit ):- http://sh.st/btjgT
Latest Full Version Of Vmware (12.0 stable full ) :- http://sh.st/btjcg

Kali Linux Official Download (2.0 , 32 & 64 bit ):- http://sh.st/btjgT
Latest Full Version Of Vmware (12.0 stable full ) :- http://sh.st/btjcg
Hardware Requirements of Kali 2.0
A minimum of 10 GB disk space for the Kali Linux install.
For i386 and amd64 architectures, a minimum of 512MB RAM.
CD-DVD Drive / USB boot support
Backtrack vs Kali vs Kali 2.0
I know that this title doesn't make sense, but I just want to let you know the different between these penetration platforms. Backtrack is the mother of penetration testing distros, first release of Backtrack released before 10 years. It's a debian based distro & is no longer being maintained. After Backtrack 5.0 R3, Kali was released & It's also called as the new Backtrack or BT 6. Kali 2.0 is the latest one to be released among all the three with better snappier interface, automatic updates & new Kernel.
Let's jump into the topic and proceed with the installation.
How to install Kali 2.0?
In this post, I used Vmware workstation 11 to demonstrate the installation of Kali 2.0. Below steps will guide you to create a VM in Vmware. In case if you are going install it on your base machine or if you know already how to create a VM in VMware workstation, you can skip this step and continue with the Kali installation.
Open Vmware workstation software, And click Create New Virtual Machine. Typical is selected by default, Click Next.
Next you will be asked to select the ISO file, click browse window & select the downloaded ISO file.


Give a proper name to your Virtual Machine, And it in a location where you have atleast 10GB free. I have named mine as Sana, A cool one isn't it?


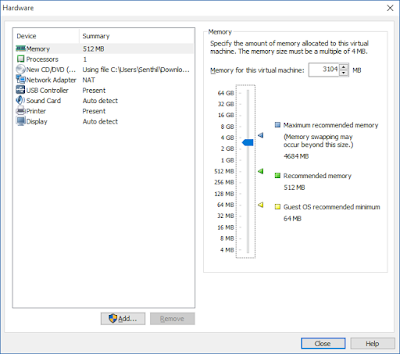
Click on Customize Hardware & Change your RAM, CPU and Network adapter settings if you want to.


Select the Guest Operating System type as Linux & let version to be Debian 6.
Give the maximum disk space that you are going to allocate for thisVM, 20GB would be sufficient in my opinion. I recommend to store the VMDK file as a single file since it would be easier to move and to convert to other formats.
Below snapshot shows my increased RAM size,

Select the number of processes that you want to allocate to this Virtual Machine,

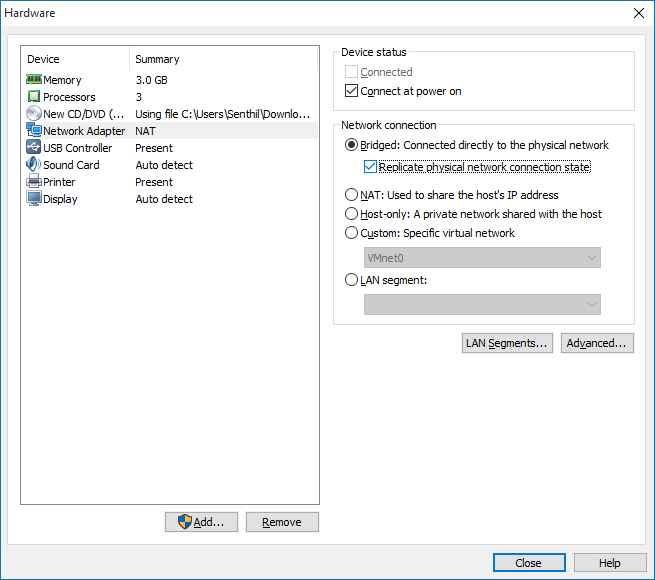
Choose the adapter settings that suites your environment, Bridged works for me.
Click close & Finish to complete the VM creation.
Kali Installation
Once your VM is created, you can power up the machine. You will see the below screen as soon as you start your VM, This article is created based on traditional INSTALL method, If you prefer a graphical installation check out Kali installation using Live CD.
In this post I am going to be using the most common Install Method. Press enter once you have selected your option.
Select your language and location & Keyboard as depicted in the below pictures,


Next step is to configure the network, refer snapshots below and configure accordingly.


All the above settings can be changed anytime. So don't worry if you do not have a default gateway or a DNS server, Just give some value & later you can change them as you wish.
Configure your hostname and root password.


Follow the below snapshots to know how to configure the partitions and disks,


Installation of packer manager (Network mirror) is optional, Select yes if you want to install.


GRUB boot loader installation,


That's it! Enjoy the ultimate Penetration testing distro ever!
0 comments:
Post a Comment